How do I issue an invoice?
While you are preparing an invoice, it is a draft document: you can change whatever you like and it doesn’t affect anything. When you click Issue it becomes an issued invoice, with its final number, and then it does affect stock, receipts and the Tax Agency.
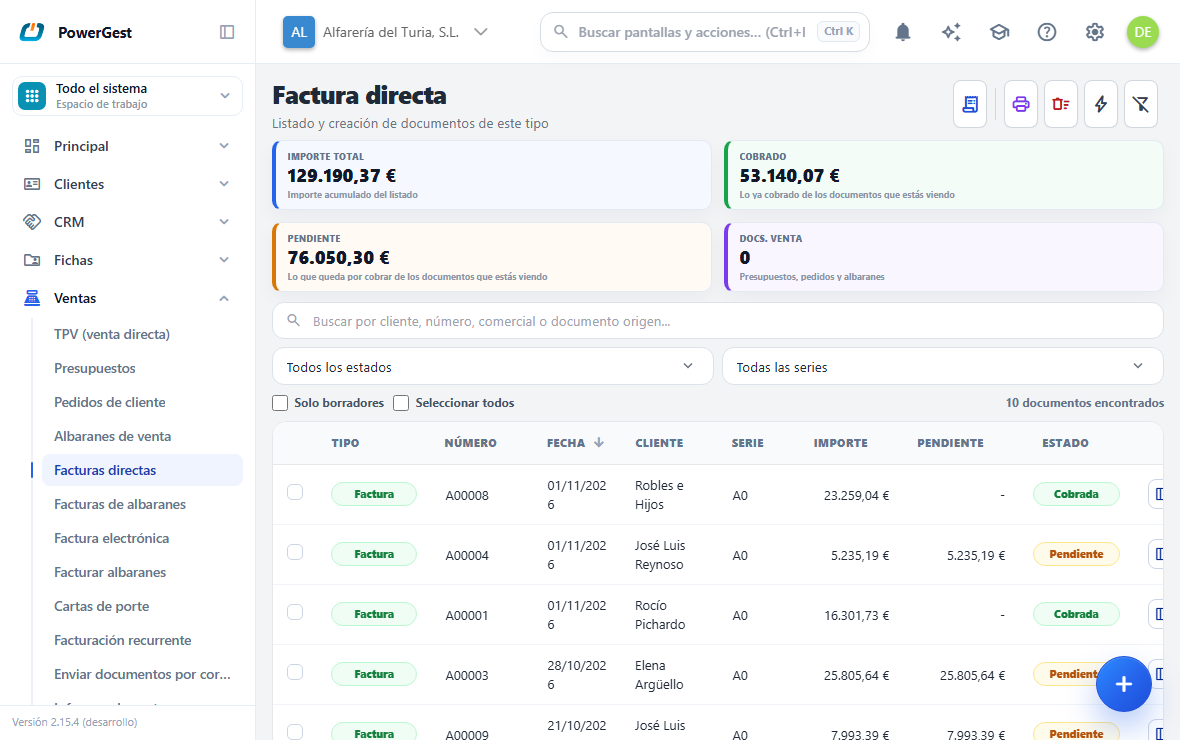
What do I need before I start?
You need the customer added, with their payment method. The receipt instalments come from the payment method. If the customer record doesn’t have one, the document takes the company’s default payment method (by default, the immediate payment one), so it is never left without one.
Where do I choose the default payment method?
In Settings → Sales and documents → Invoicing, the Default payment method for sales and Default payment method for purchases fields. The drop-down shows your active payment methods; — None — leaves the field empty when the record has no payment method. The one on the customer or supplier record always takes priority over this one, and the one you choose by hand on the document takes priority over both. It also applies to the sales orders and quotes that the assistant creates.
It is also worth having the items added. If it is something one-off that isn’t in your files, you can type the description by hand on the line.
If your company uses document series, check which one you are in before you start. The number comes from the counter of that series, and an issued invoice can no longer change series.
How do I do it?
- Go to Invoicing and click New.
- Type the customer code and press Enter. If you don’t know it, type part of the name and choose from the list. You can also click the magnifying glass to search with more criteria.
- Add the lines. On each one you enter the item code and the quantity. The price comes from the item record, and you can change it by typing over it.
- Check the footer: payment method, discounts, withholding and totals.
- If you don’t want to issue it yet, click Save. It is left as a draft document, with a provisional number of the type
BOR0001, and the screen moves on to a new empty invoice. You can go back to the draft from the list as many times as you need. If you would rather stay on the saved invoice to issue it straight away, untick Close on save in the Other menu (the three dots). - When everything is right, click Issue: it saves and issues in one go, without clicking Save first. When it finishes, the screen is also left with a new empty invoice, ready for the next one.
You can also get here from a quote, a sales order or a delivery note you already have, without typing the lines again. That is explained in from quote to invoice.
Where do I see the draft invoices so I can issue them?
In the Invoicing list, the same one that holds the issued invoices. There are two ways to keep only the drafts:
- Tick the Drafts only box above the list. It leaves only the documents that can still be issued.
- Or choose Draft in the status drop-down.
From there you open the one you want and click Issue, or tick several and issue them in one go. Drafts can also be recognised by their provisional number, such as BOR0001. The same applies to quotes, orders and delivery notes: each list has its own Drafts only box.
If any detail is missing, the screen warns you before finishing. Some warnings do not prevent issuing. For example, that less quantity is delivered than was ordered: they appear at the end and the invoice is issued anyway.
As for the price, it is worth knowing exactly where it comes from. The first price level on the item record is used. If the item has variants (sizes or colours) and that variant has its own price, the variant’s takes priority. The price list assigned to the customer doesn’t change the price suggested: it is saved on the document, but today it plays no part in the calculation. If a customer has agreed prices, you have to type them on the line.
How is income tax withholding (IRPF) applied?
The invoice sets it on its own, and it can come from two places:
- From your company. If you invoice with withholding —you said so during setup, or it is set in Settings, in IRPF withholding rate on sales—, every new invoice starts with it, and when you choose a customer who doesn’t have their own, it reminds you: ‘Withholding of 15 % from your company (the record has none)’.
- From the customer record. If their Financial tab has an Income tax withholding (IRPF), that one takes priority over yours when you choose them, and it warns you with ‘Withholding of 15 % inherited from the record’ (with the percentage from their record).
In both cases you type over it if this invoice has a different one: what you type takes priority over both.
The withholding applies to all the lines, including the ones you add later. In the footer you see it in two fields:
- Withholding %: the percentage. You can change it by typing over it. If you leave it empty or at zero, the invoice has no withholding.
- Withholding amount: what is deducted.
The Total already has the withholding subtracted: it is what the customer has to pay you, and the same happens with the receipt instalments. For example, with a base of 100 €, 21 % VAT and 15 % withholding, the customer pays 106 € (100 + 21 − 15).
If neither your company nor the customer has withholding, the invoice is issued without it. And if you switch to a customer without withholding on their record, the invoice goes back to your company’s —or is left without any, if you don’t have one set either— and it warns you.
You can’t remove the withholding from a single line: the footer percentage applies to the whole invoice.
What VAT does the invoice have if the customer is intra-EU, export or equivalence surcharge?
It is decided by the invoice’s Tax scheme, which is on the Financial tab, in the VAT calculation data block. When you choose the customer, the invoice takes the Scheme from their record and warns you with ‘Scheme … inherited from the record’.
| Invoice scheme | VAT on the lines |
|---|---|
| General | The one on each item’s record |
| Intra-EU supply, Export, Exempt or Reverse charge | 0 %, even if the item is at 21 % |
| Equivalence surcharge (RE) | The item’s, plus its surcharge: 5,2 % with 21 %, 1,4 % with 10 % and 0,5 % with 4 % |
You can change the scheme by hand in the drop-down, and the lines adjust on their own. If you go back to General, each line gets back the VAT of its item. You can also type a different VAT on a line: it is respected, and with equivalence surcharge the surcharge changes with it.
Lines that come from a delivery note or a sales order keep the VAT they had there, and the invoice takes the scheme of that document.
When it is issued, the invoice is declared to the Tax Agency with the reason that matches its scheme: export, intra-EU supply or reverse charge.
What VAT does an import, intra-EU or customs purchase have?
In purchases the scheme is also taken from the supplier record, and it can be changed by hand. Only one of them changes the VAT on the lines:
| Purchase scheme | VAT on the lines |
|---|---|
| Import | 0 %: the invoice from a supplier outside the EU carries no VAT |
| Customs | The one for each item: it is the DUA (customs declaration), where the import VAT is paid |
| Intra-EU acquisition or Reverse charge | The one for each item; that VAT isn’t paid to the supplier and doesn’t add to the total |
| General | The one for each item |
If a purchase leaves Import, each line gets back the VAT of its item.
Where do I see the invoice’s VAT and surcharge?
On the same Financial tab, below the scheme, there is a table with one row for each VAT rate on the invoice:
| Column | What it is |
|---|---|
| Tax base | What the lines at that rate add up to, before taxes |
| VAT | The VAT percentage |
| Surcharge | The equivalence surcharge percentage, or ‘—’ if that rate doesn’t have one |
| Total | The taxes at that rate: the VAT plus the surcharge |
For example, 25,60 € at 21 % with a 5,20 % surcharge: Total 6,71 € (5,38 of VAT plus 1,33 of surcharge). If you hover over the row, it tells you the two tax amounts separately.
Below is the invoice TOTAL, with the taxes already added.
This also applies to invoices imported from Powergest: the surcharge they had is shown here.
How do I collect part immediately and defer the rest?
Type in Cash what you are paid there and then. Cash and Deferred always add up to the total: the Deferred amount fills in on its own with what is left. You can also type the deferred amount, and the cash amount adjusts.
If the payment method was immediate payment and what was collected doesn’t reach the total, the document switches to a deferred payment method, and tells you which. It is the one on the customer record, if it is deferred; if not, the one in Settings → Sales and documents → Invoicing → Deferred method if immediate payment falls short (by default, ‘APL’, Deferred). As in the Desktop ERP, the cash amount takes priority.
For example, an invoice for 31,39 € with 10 € paid immediately: Deferred 21,39 €. When you issue it, the 10 € is recorded as collected in cash and the 21,39 € is left pending, with the instalments of the deferred payment method. The journal entry only has the 10 € of cash against the customer.
Some things worth knowing:
- If you choose an immediate payment method, the total is collected and the partial cash amount is ignored.
- With an immediate payment method and nothing typed in Cash, everything is collected there and then, as always.
- The cash amount can’t be more than the total or negative: the ERP doesn’t accept it and tells you why.
- If there is no deferred payment method to switch to, it doesn’t accept it either: choose a deferred method yourself or set the default one in Settings → Invoicing.
What other receipt and shipping details does the document keep?
- Cash and Deferred, in the footer: what the customer paid there and then and what is left for later. It is explained above, in ‘How do I collect part immediately and defer the rest?’.
- Cash or bank for receipts, on the Financial tab. A new document brings the one from settings: Immediate payment by default says whether it is cash or bank, and the cash account or bank account says which (Settings → Transfer). If none matches and there are several, it is left empty and you choose it.
- Account, on the same card: the sales (or purchases) account the document is posted to. When you put on a line an item whose record has its own sales account (or purchases account), the field shows that account, and the invoice is posted to it. If the lines carry items with different accounts, or you mix one with an account and one without, it says Several by item and which ones (
Several by item: 705000009, 705000010): each line goes to its item’s account. Text-only lines do not count. With no item accounts, it goes to the one in Settings → Transfer, shown in grey. If this document must go to another one (a sale of services to 705, for example), type it or look it up with the magnifier or F2: only sub-accounts you can post to are accepted, and it is typed short, as in a journal entry (705.1). In the magnifier you can search by number or by name: when you type a number (7000), the accounts that start with it come first. The one you type is the one the field shows; lines whose item has its own account still go to that one, and yours applies to the rest. - Delivery address: the customer’s branch that you choose in the address pager. When you reopen the document, the same one appears.
- Carrier, on the delivery addresses card: the carrier it is sent with. When you choose the customer, the one on their record is set; if you change it by hand, yours stays. You type the code or search with the magnifying glass, among the ones in Carriers.
- Tracking number, next to the carrier: the parcel number the carrier gives you, just as you type it. On an online store order the buyer gets it with the shipping notice; it is explained in receive the store’s orders.
- Cheque, in Other details: the number of the cheque or promissory note it was paid with, just as you type it.
- Vehicle, in Other details: the vehicle the document is for, by its registration. It is explained in add your customers’ vehicles.
- Reference: the customer’s (their order number or, in purchases, the supplier’s invoice number).
- Source doc., next to the reference: the number of the document it comes from (an invoice’s delivery note, for example). It only appears when the document has one.
In documents that come from Powergest, all of this arrives filled in as it was in the Desktop ERP, and the free text in the footer appears in the notes.
What columns does the line grid have?
With a newly created company, each line shows, in this order: Units, Code, Description, Price, Discount, Amount, Total, Order, Commission (sales only), Price list, Delivered, Delivery, Warehouse, Points, Stock, VAT, Units/box, Barcode and Image. Amount is what the line is worth before VAT; Total, with the VAT and the surcharge included. You can change the width of any of them by dragging the edge of its header, and its order by dragging the header itself.
The Description takes up to 500 characters, and its column starts wide: about 100 can be read without being cut off. If you want it narrower, drag its edge; if you had already given it a width, yours stays.
The width you give a column and the place you move it to are remembered: they are yours, they apply to all documents (a sales order, a delivery note, a purchase invoice…) and they stay the same the next time you come in. The keyboard arrows go through the columns in the order you see them. Changing typing mode (Standard, POS, Full) doesn’t affect it: each column keeps its own. When only a few columns are visible, the grid stretches them to fill the width of the screen.
Units/box is the units per box. When you put the item on the line they are copied from its record (Units per box) and stay saved on the line: if you later change the record, the lines already made don’t change.
Some only appear when they apply: Size and Colour if the company works with sizes, Serial/Batch if it manages batches or serial numbers, Comp. if it manufactures, and Src. pending while the document is being made from another one.
- Delivery: the date that line is delivered, if it is different from the document date. It is typed like any date (
15/02,+7…) and empty means ‘the document’s’. - Order: which document each line comes from (a delivery note’s sales order, an invoice’s delivery note). It is hidden to begin with, because it takes up space and only lines that come from another document have it; you show it from the Columns button (see the next question). If the source document isn’t in the ERP (a Powergest sales order that wasn’t migrated), it shows the number it had there.
- Gross and Disc. amount: units × price, and what the line’s discount takes off in money. Gross minus Disc. amount is the Amount: that way you can read on the row how much the discount has taken off. They are hidden to begin with; you show them from the Columns button. With prices including VAT they include the VAT, like the price.
In documents that come from Powergest, the delivery and the source sales order arrive as they were.
The columns don’t depend on the typing mode: switching between Standard, POS and Full changes the order in which the fields are filled in, not what you see.
Why doesn’t the overall discount change the price or amount of the lines?
Because the overall discount (the Discount in the summary at the bottom) is applied after the lines, just like in the desktop ERP. Each line shows its price, its own discount and its Amount and Total without the overall discount; the summary shows how much it takes off, and the net total and the Total already have it deducted.
For example, 96 units at €1.14 with a 5 % overall discount: the line shows an Amount of €109.44, and the 5 % appears only once, in the summary. Printing works the same way: the line price and amount come out without the overall discount, and the discount is shown in the document footer. The discounted price printed by the layout uses the price decimals set in Settings, as on screen.
How do I choose which columns are shown?
With the Columns button, the icon with vertical bars next to the line counter. It opens a window with all the columns the grid can have in that document, in their order. Each one has its name and what it shows; when you hover over the row you see it in full.
- Click the eye of a column to hide it, and the crossed-out eye to show it again.
- The ones with a padlock can’t be hidden: they are the ones you type when making a line (units, code, description, price, discount, VAT) and the ones that open the line windows (size, batches, components). Without them the line couldn’t be completed.
- Reset leaves the columns as they come by default: which are shown, their order and their width.
The choice is yours, not the company’s: it is remembered for your user in all documents —also in the POS, which has the same button—, the next time you come in, and it doesn’t change what your colleagues see.
How do I delete a line?
In the document, with the cross each line has on its left, or with the Del key from any cell of the line.
- An empty line —no code, description or price— is deleted without asking.
- A line with data asks for confirmation in the Delete line window: Delete removes it and Cancel (or Escape) keeps it. With the keyboard, the window opens already on Delete: just press Enter.
The window has two checkboxes, to stop seeing it or to clear up the grid:
- Don’t ask again when deleting a line: from then on lines are deleted without confirmation.
- Hide the delete cross on lines: the cross is no longer shown and lines are deleted with Del only.
What you tick is remembered for your user even if you press Cancel, and it applies to all documents. To change it later, open Columns: at the bottom of the window, under When deleting a line, are the two checkboxes.
The line is not really gone until you press Save. A line that has already been delivered or invoiced can’t be deleted: the cross is greyed out and says why.
How do I leave a blank line to separate?
Go to the line that will be below the gap and press Insert, or click the Insert line icon the line has on its left, next to the cross: an empty line opens above it, in that place and not at the end. Leave it empty and save. An empty line between two lines is saved as a blank line, with no units. The empty row at the end, the one for typing the next line, is not saved. In view-only mode the icon is greyed out: press Edit to insert.
In the free text at the bottom you can also leave blank lines between paragraphs: they are kept.
Why doesn’t a line without a code have units?
A line with no code and no price is a separator: a heading, a comment or a gap. It adds nothing to the document, so its Units box is left blank, on screen and on the printed document, and it doesn’t count towards the total units.
If you give it a price, it stops being a separator: it is a free line that is charged, and it has its units (1, unless you type others). The same if you give it a code. If you type units other than 1 on a line with no code and no price, they are kept and shown.
Does the numeric keypad dot type the decimal comma?
Yes. In the number boxes of the lines —units, price, discount, measurements— the dot on the numeric keypad types the decimal comma, as in a spreadsheet: you type 12.5 and get 12,50. The dot on the main keyboard still types a dot.
How do I make more room for the lines?
The document screen has three blocks that fold: Invoicing details at the top (in a purchase document it is called Purchase details), Document lines in the middle and Financial summary at the bottom.
With compact mode turned on, the header and the footer fold on their own: when you start typing in the lines, the header folds; when you go back up, the header opens and the footer folds, and when you go down to the footer the opposite happens. You can also fold or open them yourself with the arrow in their title. The lines never fold and always keep room for a few rows.
A folded block doesn’t hide what matters. The folded header still shows in its title the code, the date and the customer. The folded footer still shows the total, the discount, the due date and the payment method.
What does compact mode do?
It is the button with the two arrows in the bar at the top of the document screen. When you hover over it, it tells you which mode you are in.
With compact mode enabled, the screen fits the window and scrolling happens inside the line grid.
With compact mode disabled, the page scrolls normally, showing the whole header and footer.
The mode is yours, not the company’s: it is remembered for your user and stays the same the next time you come in, also from another computer. Changing it doesn’t affect what your colleagues see.
What is on the bar at the top of the document?
From left to right:
- Icons for what only looks things up or exits: compact mode, the currency, Print, Stock (in documents that move stock), Label (in those that have one) and the orange X for Cancel, which goes back to the list. They have no text: when you hover over each one you see its name.
- Save and Issue, with their text, because they are what is used every day. On a production order or a delivery note with a signature, the buttons for its cycle also appear.
- Other, the three-dot icon, a menu with what is used less: Direct printing (when ticked, it prints without a preview on the workstation’s printer), Close on save (when ticked, Save moves on to a new document; unticked, you stay on the saved one), View posting (on an invoice), Labels, Credit, Replace, Undo replacement and, last and set apart in red, Delete (or Void, on an issued invoice). Each option only appears when it applies to that document.
- The pencil for Edit / Editing, always the last one.
Delete is inside Other on purpose: next to Save and looking the same, a careless click could delete instead of saving.
What is the difference between Save, Print and Issue?
All three save what you have on screen. What changes is what they do next:
| Button | What it does |
|---|---|
| Save | Only saves. An invoice is left as a draft document; an order or a delivery note, saved. It doesn’t produce the PDF. |
| Saves and prints: the PDF preview, or the workstation printer if you have Direct printing ticked. | |
| Issue | Saves and issues the invoice: final number, Tax Agency, stock, receipts and accounting. Produces the PDF. Only appears on invoices. |
When it finishes, the screen is left with a new empty document of the same type: one invoice after another, without going back to the list. What you have just saved is in the list. If you would rather stay on the document when you save, see the next question.
Two cases in which it waits before moving on to the new document:
- If you have Label ticked and its window opens, it waits until you close it.
- If the browser blocks the PDF tab, Open PDF appears on the bar. Clicking it opens the PDF and the screen moves on to the new document.
When you are viewing a document (the crossed-out pencil), Print only prints: there is nothing to save and the document stays on screen.
On a production order, a service report, a production report or a warehouse transfer it doesn’t move on to a new document: the document stays on screen so you can keep working on it.
How do I stay on the document after saving it?
Open Other (the three dots on the bar) and untick Close on save. From then on, when you click Save (or Print) the document is saved and you stay on it, already saved: on an invoice, sales or received, you can click Issue without looking for it in the list.
- Issue still leaves a new empty document: the issued invoice is finished.
- The box is remembered: it stays as you left it when you open another document, on another day. It belongs to each user and works the same in sales and purchases.
- Ticked, which is how it comes, Save moves on to a new document, as explained above.
How do I issue several invoices at once?
From the list. Tick Drafts only, tick the invoices you want and click Issue (N) (N is how many you have ticked). They are issued one by one, in the order they were created, and each on its own: if one fails, the others are issued anyway.
When it finishes, a report appears with one row per invoice: Issued, with its warnings if it had any, or Error, with the reason. Export CSV downloads it so you can review it. The ones that failed stay as drafts: correct what the reason says and issue them again.
Why do the buttons at the top show only the icon?
Because they don’t fit with their text in the width of the window. The bar at the top of the document adjusts itself: first it removes the texts that remain (Save, Issue, Other…) and leaves the icons, and when you hover over each one you see its name. If they still don’t fit, the buttons move down to a second line. None of them disappears.
The same happens on the list bar, which also keeps what doesn’t fit in the ··· menu. That is why those buttons have short names —New order, Print, Bulk delete—, with the full name when you hover over them. In the Type column of the lists it is the same: it says Order or Report, and the full name appears when you hover.
Where do I see the drafts I still have to issue?
In the invoice list: Sales → Direct invoices (or the document type you want). Above the list, tick Drafts only: only the documents that can still be issued remain. Open the one you want and click Issue, or tick several and issue them together.
There is no separate drafts screen: a draft is a document in the list that does not have its final number yet.
What happens when I click Issue?
When you issue, several things happen at once. If any of them fails, none of them is done: the document stays as it was and nothing is lost.
The first thing it does is save what you have on screen, even if you haven’t clicked Save: that way exactly what you are seeing is issued. If that save fails, it tells you and issues nothing.
Then it checks the customer, because the Tax Agency requires it:
- A full invoice to a Spanish customer needs their Tax ID on the record. The customer is Spanish if their record has no Country or says Spain.
- A customer from abroad (another country from the list on their record) can go without a Tax ID. If the record has something written that isn’t a country (‘Valencia’), it isn’t issued until you choose the country. It is issued, but the Issue button turns orange, with the warning icon, and when you hover it says Will be issued as a full invoice without the customer’s Tax ID: the Tax Agency may reject it: Veri*Factu asks for the customer of a full invoice to be identified.
- The format of the number doesn’t stop the invoice. With a country other than Spain, the number goes to the Tax Agency as their country’s document, even without the country prefix (for a customer in Portugal, ‘380539890’ goes as ‘PT380539890’).
- A simplified invoice (the one for an immediate-payment customer) can’t go over the simplified invoice limit the company has in the POS settings. If it does, choose a customer with a Tax ID.
Before you click Issue you already know: when you hover over the button it says Will be issued as a simplified invoice or Will be issued as a full invoice, depending on the customer chosen, and why. It is simplified when the customer is in Settings → POS and terminal settings → POS settings → Cash customers (each company’s ‘Venta al público’ or ‘Contado’); if you want to sell to a generic customer without a Tax ID, add them there.
If any of that fails, nothing is issued and the message says what is missing. The invoice stays as a draft so that you can correct it. It is the same whether you issue from here, from Invoice delivery notes, from the list or from the assistant. An invoice for zero can be issued.
It also looks at the date. If it falls in a VAT period that is already closed —its VAT return was made final, or it was closed by hand—, issuing changes what has already been declared:
- If you have the Issue in a closed VAT period permission, a warning appears explaining it and you choose Issue anyway or Cancel. It is the way to make a supplementary invoice to correct a quarter; afterwards the supplementary VAT return will have to be filed.
- If you don’t have it, it isn’t issued and the message tells you which permission is missing. Ask whoever manages permissions for it, or change the date.
This is what happens:
- The invoice gets its final number from the series. It is consecutive and has no gaps. The provisional number of the draft document disappears.
- Stock is reduced, with the batch or the serial number if the item has them.
- The receipt instalments are created according to the payment method. If it is immediate payment, it is also left collected, with its cash movement. If you collected only part immediately, that part is left collected and the rest pending.
- It goes into the VAT registers and the journal entry is generated. If it is immediate payment, the receipt goes in that same journal entry, after the invoice: customer against sales and VAT, and then the cash or the bank against the customer. A POS receipt is posted the same way.
- It is registered with the Tax Agency, with a digital fingerprint linked to the previous invoice. The sending itself happens a moment later.
- If the document has a sales agent, their commission is calculated (see the next section).
How is the sales agent’s commission calculated?
When a sales document has a sales agent, their commission is calculated and saved as soon as it is saved, without waiting for it to be issued, and it is redone every time you change it and when it is issued. It applies to quotes, sales orders, delivery notes, invoices, credit notes and receipts. It is what the sales agent reports show.
The sales agent is taken from the customer record when you choose the customer, the same as the payment method: if the customer has a sales agent, the document already comes with them. Two points:
- What you type by hand takes priority. If you put a sales agent on the document, choosing a customer doesn’t change it.
- If you change customer, the sales agent becomes the new customer’s — unless you had typed it yourself.
With no sales agent on the document there is no commission to calculate, and the two boxes stay at zero.
The sales agent is set on its own: when you choose the customer, the document takes the Sales agent from their record. If you change customer, it also changes to the new customer’s (or is left empty, if that customer doesn’t have one). A sales agent you have chosen yourself in the header isn’t changed. In purchases the same happens with the sales agent on the supplier record.
The sales agent on the customer record also arrives by the other routes when the document doesn’t bring one: when invoicing a sales order or a delivery note without a sales agent, in tablet orders that arrive without a sales agent (before the tablet’s sales agent) and in documents created by the assistant.
The document keeps three figures: the sales agent’s percentage, the base it is applied to and the commission amount.
- The percentage is the Commission (%) on the sales agent’s record, or the one you type on the document. It stays saved on the document: if you later change the record, this document keeps its own. If you change sales agent, the new sales agent’s is used.
- The base is decided by Settings → Sales and documents → Prices → Sales commission calculation:
- On the sale price (the default one): what the lines add up to with their discount, before the general discount.
- On the net sale price: with the general discount already applied.
- On the cost price: the cost saved on the lines.
- On the profit: the net minus the cost.
- The lines can have their own percentage in the Commission column. That line earns commission on its own amount.
How the two are combined is decided by Settings → Sales and documents → Prices → Commission type:
- By lines and on the total (the default one): the commission is the sales agent’s percentage on the document base, plus that of the lines that have their own percentage.
- By lines only: each line without a percentage takes the sales agent’s, and the document commission is the sum of its lines’. A line with another sales agent takes that sales agent’s percentage.
An example with the sales agent at 13 % and a line of 4 × 10 €: the commission is 5,20 €. If that line also has its own 5 %, with By lines and on the total the commission is 7,20 € (2,00 + 5,20).
If you change a document that has already been issued, the commission is recalculated in full with the new lines. Invoices that come from the Desktop ERP keep the commission they had. Purchases don’t have sales agent commission.
The percentage and the amount are shown on the Financial tab, Costs and commissions block: Sales agent commission (the percentage) and Total commission (the amount). They are shown before saving: they change as soon as you choose the customer or the sales agent and as soon as you touch the lines.
- To agree a different percentage with the sales agent on this document, type it in Sales agent commission: the total is recalculated straight away and saved with the document. If you empty it, the one from the sales agent’s record comes back. With no sales agent on the document the box can’t be typed in.
- With By lines only, the new percentage also reaches the lines that had the sales agent’s. The lines you gave a different percentage keep it.
- It can also be changed on an invoice already issued: the commission isn’t tax data.
- If the box won’t let you type, hover over it: it says why (the sales agent is missing, the document is in view mode, your permission is view-only or it comes from the Desktop ERP).
Each line’s percentage is shown in the Commission column of the grid.
Why does a cancelled invoice no longer appear in the list?
Because cancelling is a deletion that leaves a trace: the invoice keeps its number, its record with the Tax Agency and its cancellation, but it is no longer among the live ones. With All statuses the list shows everything except what is cancelled; to see it, choose Cancelled in the status drop-down. The same goes for quotes, orders, delivery notes and purchase documents.
What can I no longer change after issuing?
An issued invoice can’t be deleted, or have its number changed, or have its series changed. The law prevents it and so does the program.
If you have made a mistake, the solution isn’t to delete: it is to correct, and it has its own procedure in correct an invoice.
The tax details don’t change either: the customer, the date, the items, the quantities, the prices, the taxes, the withholding, the currency or the amounts. That has already been recorded, and it is corrected with a credit note. The lines are fixed: none are added or removed.
What can I change on an invoice that has already been issued?
If Veri*Factu is off, or connected to the test environment, you can change the whole invoice, including the lines that come from a sales order or a delivery note (item, price, discount and VAT). With Veri*Factu sending to the real environment, if your company allows it, the non-tax details:
- the reference, the sales agent, the payment method, the cash amount, the carrier, the cheque and the vehicle;
- the text of each line, in the Description column;
- the date of the instalments that haven’t been collected yet.
Click the pencil on the top bar, change what you need and save. While you are editing an issued invoice, the tax details can’t be touched; the pencil reminds you of this when you hover over it. On the lines, Enter goes from Description to Description.
If you only change the text of the lines, the reference, the transport or the dates of the instalments, it is saved as it is: the open items, the cash receipt and the journal entry aren’t redone. If you change the payment method, the cash amount or the sales agent, the invoice recalculates its instalments and its commission.
The same applies to a POS receipt: it is a simplified invoice, and its Edit button opens it here already in edit mode (look up, reprint or return a receipt).
How do I change the date of an instalment that hasn’t been collected yet?
- Open the invoice and click the pencil to edit it.
- Go to the Financial tab, to the instalments table.
- In the Due date column, the date of each uncollected instalment appears as a date field. Change it.
- Click Save.
Only the date of a pending instalment from which nothing has been collected can be changed. One that has been collected, partly or fully, or returned, keeps its date: it is already part of its direct debit batch. The amount and the number of instalments don’t change.
You can’t change in the same save the date of an instalment and something that recalculates the instalments (the payment method, the cash amount or the sales agent): the date you have set would be lost. Save that change first and the dates afterwards.
Instalments are collected from collect an instalment.
How do I split the instalments into other dates or amounts?
On an issued invoice, below the instalments table on the Financial tab, click Change instalments. You don’t need to click the pencil, and it also works with Veri\*Factu: instalments are collection data, not tax data.
In the window you can change the date, the amount and the payment method of each instalment, and add and remove instalments. The only fixed thing is the total: it has to add up to the same as before, and what is left to allocate is shown at the top. Clicking Save records it at once.
Only pending instalments with nothing collected are included. If you have unsaved changes on the invoice, the button doesn’t appear: save first. It is the same window as the Instalments button in collect an instalment.
In the same save you can’t change the date of an instalment and something that recalculates the instalments (the payment method, the cash part or the agent): the date you set would be lost. Save that change first and the dates afterwards.
Instalments are collected from collect an instalment.
Why does the document open without letting me change anything?
Because opening a document is viewing it. When you open a quote, a sales order, a delivery note or an invoice you already had, the label Viewing appears next to its status (for example Issued). Hover over it for the explanation that nothing can be changed. If the window is narrow, the label isn't shown. That way an extra tap doesn’t change a document you only wanted to look at. The fields appear locked, except Document, which is for going to another one.
On an issued invoice you are editing, the same happens with the tax details: the warehouse, the customer or the date appear locked, and only the non-tax details can be typed in.
To change it, click the pencil, the last button on the bar (it says Edit, with the pencil crossed out): it turns coloured, changes to Editing and the Viewing label disappears. If you click it again, you go back to viewing it; with unsaved changes it won’t let you, so as not to lose them: save them or click the X for Cancel.
If the document can’t be edited, the pencil appears crossed out and can’t be clicked: your permission is view-only, the document is voided or replaced, or your company doesn’t allow editing issued invoices. When you hover over it, it tells you the reason.
Credit, Replace (in the Other menu) and Print don’t need the pencil: they don’t change the document you are looking at.
How do I open a document by typing its number?
In the Document field, at the top left, type the number and press Enter. If that document already exists, the program asks you what you want to do, as in the Desktop ERP:
- View: it opens it to look at, without changing anything. It is the selected option, so another Enter is enough.
- Edit: it opens it already in edit mode, with the pencil coloured.
- Cancel (or Escape): you stay in the document you had, and the field goes back to its number.
With the arrows you move from one option to another. If there is something unsaved in the document you had, the question warns you that it would be lost.
It also works while you are viewing: type another number and you jump from one document to another without going back to the list. The magnifying glass in the field does the same: you search for the document, choose it and the same question appears.
If the number doesn’t exist, the field goes back to the number of the document you had and the magnifying glass opens searching for what you typed. It searches documents of the same type (invoices from an invoice, sales orders from a sales order) and from the financial year you are working in. If you type just the series, on a new document, the document moves to that series and suggests its next number.
How do I print or download an invoice I had already saved?
You don’t need to save it again. Open the invoice from the list and on the top bar you have Print, which opens the browser’s print dialogue. Right next to it is Download (the down arrow icon), which saves the PDF to your computer. If the browser blocked the pop-up tab, Open PDF also appears.
When you open it you are viewing it, so Print only prints and the invoice stays on screen. If you click the pencil to edit it, Print first saves your changes, prints and leaves a new empty document, like Save.
It works with any saved document, whether draft or issued invoice, and also after changing its format: the PDF is generated at that moment, with the design it has at that moment.
The Format can be changed even if you are only viewing the document: the PDF comes out with the one you choose, without saving it on the document.
The ‘Save the document before printing’ warning only appears on a document that doesn’t exist yet, that is, one you are creating and have never saved. With a saved one it can’t appear.
If the lines don’t fit on one page, they carry on to the next when they reach the end of the lines box, as in the Desktop ERP: they are never printed over the totals. The frame and the details at the top (company, customer, number) appear on every page; the base, the VAT, the total and the instalments, on the last one.
Which delivery address appears on the printed invoice?
The one the document chose in the address pager. If the layout has a delivery box —many delivery notes and invoices have one—, it shows the name, the street, the postcode, the town / city and the province of that address: the shop the goods are going to, not the customer’s registered address. The customer’s tax details still appear in their usual box.
The delivery box repeats the details from the customer record when:
- the document has no delivery address chosen;
- the chosen address no longer exists on the customer record;
- the chosen address has no street.
If the address has a street but no name, it shows the customer’s trade name. The same applies to delivery notes, sales orders, quotes and purchase documents that have a delivery address.
The town line on paper comes out in full, ‘postcode, town (province)’, both in the customer’s address and in the delivery one.
What if I don’t have enough stock?
If your company keeps stock, you find out when you type the line, not when you issue. On a sales order, a delivery note or a sales invoice, if you type an item or a quantity that is more than there is in the warehouse, a window appears: ‘There are only 3 of … in the warehouse and you are asking for 10. Continue?’. It also counts what the other new lines of the same document already have.
- Keep going (or Enter) sets the quantity you have typed.
- Undo (or Escape) leaves the line as it was, with the cell ready to correct.
If your company doesn’t allow selling without stock, there is no question: the line doesn’t accept the quantity and tells you how many there are. In purchases you are never asked. Nor are you asked about an item that doesn’t have Stock control ticked on its record. The question only appears if, in Settings → Warehouse and production → Warehouse, Ask about stock when typing the line is set to Ask. By default it is set to Don’t ask, and it is switched on automatically when, while setting up the company, you say that you keep stock. If you make to order or don’t keep your stock up to date, leave it on Don’t ask. The Stock column of the grid shows what there is of each item in its warehouse.
When issuing, it depends on how your company is set up. There are two behaviours, and they are very different:
- Invoice anyway (the most common): the quantity you have entered is invoiced and stock is left negative. It is what you expect when you sell something that hasn’t arrived yet. By default there is no other warning than the question when typing the line. If you want a warning when saving as well for each line that leaves stock negative, whoever administers the ERP turns it on in Settings → Warehouse and production → Warehouse, Control, batches and serial numbers block: Warn about insufficient stock when saving.
- Deliver only what there is: the quantity is adjusted to what is available and it warns you of the cut. What is missing is left pending on the source document, if it came from a sales order.
In neither case is issuing prevented for lack of stock, unless it has been set up that way on purpose.
What if you want it NOT to let you issue without stock? You can, and it is a single setting: in Settings → Warehouse and production → Warehouse, set Check stock to Control stock. From then on, a line that would leave the warehouse negative is not accepted and the document is not issued. Turn it on only if you keep your stock up to date: if you sell what has not arrived yet, it will block good sales. The usual choice is the pair Ask about stock when writing the line and Warn about insufficient stock on save, so you find out at both moments and decide yourself.
Where is the e-invoices button?
In the sales documents list, at the top right, with the name E-invoices. It takes you to E-invoice management, where an issued invoice is converted into the Facturae file that is sent to the Public Administration.
It only appears in the sections that produce a sales invoice: Direct invoice and Delivery note invoice. In Quote, Sales order and Sale with delivery note it isn’t there, because those documents aren’t issued as an e-invoice.
It doesn’t appear in purchases either. E-invoicing is an obligation of whoever issues, and in a purchase the supplier issues.
If the top bar is narrow, the button is gathered into the ··· menu at the far right together with the rest of the secondary actions. It is still there.
How do I go from here to the invoice’s accounting?
On an issued invoice you have View posting in the Other menu (the three dots) on the top bar. It takes you to the Accounting journal and leaves you on that invoice’s journal entry, highlighted.
The journal entry isn’t opened for editing: it is shown. You come to look, not to touch.
At the top of the journal, ← Back to the invoice appears. With that link you go back to exactly where you were, without searching for the invoice again.
The button appears greyed out with the message ‘This invoice has not been posted’ when there is no journal entry yet. That happens while it is a draft document: the journal entry is created when you Issue. As soon as you issue, the button lights up without reloading the screen.
On a quote, a sales order or a delivery note the button doesn’t appear: those documents don’t generate a journal entry.
If something goes wrong
| What you see | What has happened | What to do |
|---|---|---|
| ‘That document doesn’t exist or doesn’t belong to this company’ and it goes back to the list | A document number that doesn’t exist was opened, or one from another company (an old link, or the company was changed) | Look for it in the list; if it belongs to another company, switch to it at the top left |
| ‘Customer … is blocked: no new documents allowed’ | The Blocked box is ticked on their record | If you can invoice them again, untick the box on the Financial tab of their record |
| ‘Customer … is inactive’ or the customer doesn’t appear when you search for them | Their Status is ‘Inactive’ | Change it to ‘Active’ on the General tab of their record |
| ‘The document does not exist.’ | The draft document was deleted, or you are in another company | Check at the top which company and financial year you are in |
| After saving or issuing, the invoice is still on screen | The Label window is open, or the browser blocked the PDF tab | Close the label, or click Open PDF: then it moves on to the new document. If neither appears, the save failed: read the warning |
| After saving, the invoice stays on screen and says it is saved | You have Close on save unticked in Other | That is what the box does: you can issue it right there. Tick it if you prefer to move on to a new one when you save |
| When I save, the screen moves to a new invoice and I have to look for the draft to issue it | Close on save is ticked (that is how it comes) | Untick it in Other: you will stay on the saved invoice and can click Issue |
| ‘Save the document before printing.’ | The document has never been saved | Click Save. If you get it on an invoice that is already saved, tell support |
| ‘The document PDF could not be generated…’ | The format it is printed with can’t be laid out (a broken design, an image the engine can’t draw) | The message itself says the reason. Choose another format in the drop-down, or tell whoever looks after the designs |
| It asks you for the batch or the serial number | The item has them and the quantity still has to be allocated | Open the line breakdown and allocate until it matches |
| Warning that less quantity is delivered | There wasn’t enough stock | Check the pending quantity. If you are expecting goods, invoice later |
| The number isn’t the one you expected | You are in another series or another financial year | Don’t change the number yourself: tell whoever administers the ERP |
| View posting is greyed out | The invoice doesn’t have a journal entry yet | If it is still a draft document, click Issue |
| ‘Cannot issue: the customer has no Tax ID’ | It is a full invoice and the customer record has no Tax ID | Add the Tax ID to their record (or their document and country, if they are from abroad) and issue again. If it is a generic counter customer (‘Venta al público’), add it in Settings → POS and terminal settings → POS settings → Cash customers: their invoices are simplified and don’t ask for a Tax ID |
| ‘Cannot issue: … exceeds the simplified invoice limit’ | The customer is an immediate-payment customer and the total is over the company’s limit | Switch to a customer with a Tax ID to issue a full invoice |
| ‘VAT for … is already closed. Issuing an invoice with that date requires the permission…’ | The date falls in a closed VAT period and your role doesn’t have Issue in a closed VAT period | Change the date, or ask whoever manages permissions for the permission |
| View posting takes you to the journal but doesn’t mark the journal entry | The journal has filters set that leave that journal entry out | Click Clear in the journal search and try again |
| The document commission comes out at zero | The sales agent’s record didn’t have Commission (%) when it was issued | Set it on the record and save the document again: it then takes the percentage |
| A document without a sales agent has no commission | The commission always belongs to a sales agent | Put the sales agent in the header and save |
| When I open a document I can’t type anything | It opens in view mode (crossed-out pencil) | Click the pencil on the top bar |
| The crossed-out pencil can’t be clicked | You don’t have permission to edit, the document is voided or replaced, or your company doesn’t allow editing issued invoices | Hover over the pencil: it says the reason |
| ‘The invoice is already issued: only non-tax data can be changed…’ | You are trying to change the customer, the date, an item, a quantity or an amount on an issued invoice | Correct it with a credit note (correct an invoice). The text of the lines can be changed |
| ‘You changed the due dates and also something that recalculates them…’ | In the same save there are changed instalment dates and a different payment method, cash amount or sales agent | Save that change first and then set the dates again |
| ‘The instalment due on … is already paid or returned: its date can’t be changed.’ | That instalment already has a receipt, even a partial one | Its date is part of the receipt. If it has to be changed, first undo the receipt from Receipts |
| When saving with Warn about insufficient stock when saving turned on, ‘Insufficient stock of …’ appears | The line leaves stock negative; the invoice has been saved anyway | It is only a warning. If it is a nuisance, it is turned off in Settings → Warehouse and production → Warehouse |
| ‘There are unsaved changes…’ when clicking the pencil to go back to viewing | Going back to view mode would throw away what you have changed | Save, or click Cancel to leave without saving |
| I type a document number and the magnifying glass opens | That number doesn’t exist in that document type or in the financial year you are in | Look for it with the magnifying glass, or change financial year if it is from another year |
Next: Correct an invoice · From quote to invoice
More about Invoicing
- How do I delete a document?
- How do I make the consignment note for a shipment?
- How do I charge shipping or expenses without VAT?
- Setting up numbering series
- How do I convert several documents at once?
- Why is my invoice one cent out and how do I fix it?
- How do I turn a quote into a sales order, a delivery note or an invoice?
- Can I leave a document half-done and go to another screen?
- How do I deliver a sales order in several deliveries?
- How do I invoice a fee that repeats every month?
- How do I invoice several delivery notes at once?
- Pro forma invoices